| Home Page
Photo Page
Photo2 Page
|
|
Step by step...
The text is from the Explorer4x4.com
message board, a post from Stephen S, 02-10-2001
at Performance Lighting > Dim Dashboard Lights,
hope you like what I did, and Thanks...
|
|
|
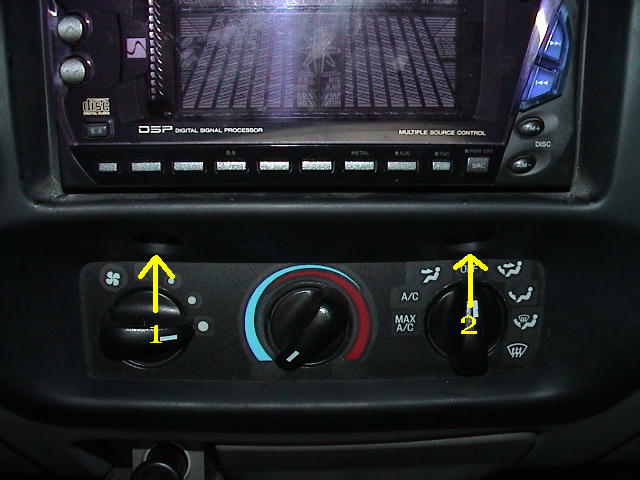
Start by removing the two screws
above the climate controls.
Well, to get the dash apart,
start by removing the two screws above the
climate controls. The black trim that holds the radio
just snaps off after the screws are removed.
Carefully unsnap the black trim and pull it out
a bit (the four wheel drive switch will likely
need to be unplugged to allow enough clearance.(left)
Then just pull it down carefuly.(down) |
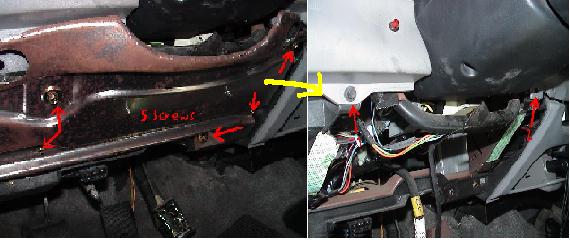
Then move to under
the steering wheel.
The plastic cover (where the hood latch is)
beneath the steering wheel has a screw on the
right corner and one on the left corner.
It also has two that hold the hood release on.
Remove all four screws and unsnap the top
edge to remove the panel.(Down)
|
|
|
|
Next Step...
Under the plastic panel
you just removed, there is a metal plate.
It has a screw in each corner, and one all the way down.
These may be tight, but they'll come loose.
Remove all five and the panel will fall off.
You should now see two screws,
holding the bottom of the
upper dash panel on.
Remove these two. |
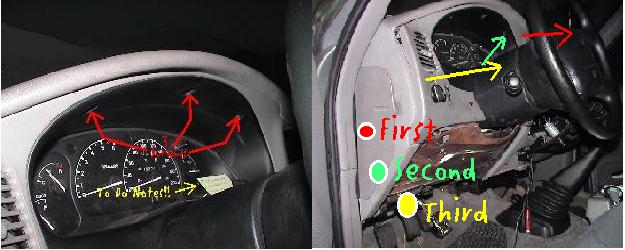
Now,...
...sit in the driver's seat, set the parking brake, put the shifter into 1, and tilt the steering wheel to its lowest position. Remove the three screws just over the guages. There may be a screw that was hidden by the radio trim, look for it and remove it as well.
Now carefully pull on the dash panel, the radio side first. It's a little tight to get out, but it'll go. You'll soon run into trouble with the headlight and dimmer switch. Their wires are kinda short. You can unplug them if you want, but I left them alone. I just carefully twisted the dash panel over the steering column without binding the wires and set it on my leg.
|
|
|
|
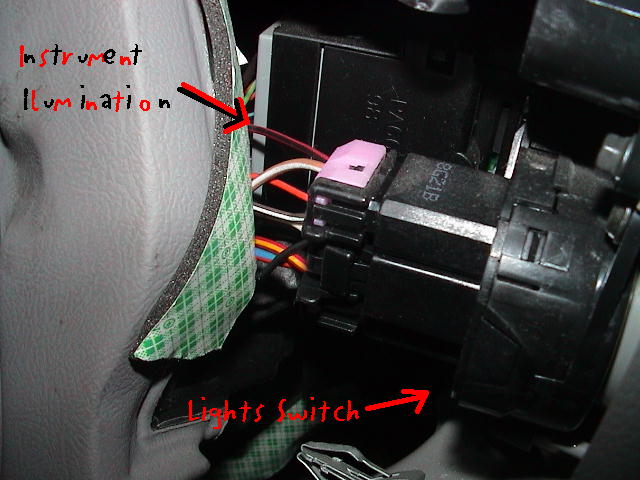
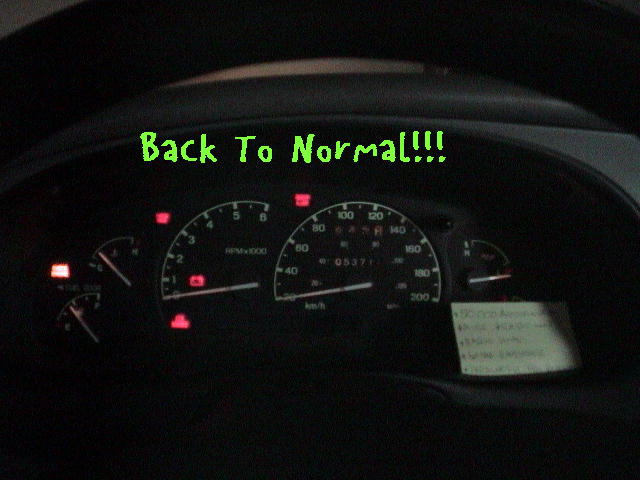
I was lucky...
I remove the control panel to check
for any unplugged wires behind it,
because when I turned on the lights, it was like DEAD!!...
Well, it was this cable,(left)
just a litle push and it was back
were it belongs...Am I lucky or what???!!
Well I don´t have anymore Pics,
but I have the explanation of what to do next...
here it is... |
Sorry about the pics... but my job was done by this moment...
Now you will see the guage cluster. There are 4 screws holding the cluster in (one per corner). Remove these and carefully work the cluster out. Remove the gear indicator as soon as you can get to its snaps. The cable is really short, which makes it difficult, but with a little patience it'll come out.
If you're just replacing bulbs, you can do so without unplugging the guages. Just twist it to the left and right enough to get your eyes and a pair of pliers behind it. There are 6 illumination bulbs. Their sockets are the black ones, the largest of them all back there. Just twist them to the left and they unsnap and can be removed.
If you wanna clean your guages (mine were dusty) or if you are installing a guage kit, you'll want to remove the clear cover. You may want to unplug the cluster and remove it from the truck to install a guage kit. The cover is held on by the 7 gold colored screws around the cluster. Remove them all and the cover will come off. Be carefull with the needles!!
Assembly is the reverse.
Hope this helps you out.
|
|
|
|
|
|
|